Wednesday, December 21, 2011

Yarn Trees

Last year after Christmas, I hit Target and bought (what was left over!) all new ornaments. Andre and I decided we wanted to veer from our traditional red/green rustic decor, and go with bright colors. Needless to say, I was super psyched to get the tree up this year to see those newbies! (Pic of tree coming soon. My camera battery died right after taking these!)


Ok, so having new tree decor allllllllllllssssssssoooooooooooooo means new mantle decor. Now, we all know time has been short for me (yada, yada, yada) It just about killed me to put the mantle on the back burner until Chatty was over. Anyhoo, I worked with what I had, and then I decided to add these yarn trees. I have been wanting to make some for a couple of years, but they just wouldn't really blend with my old mantle get up. To start off, I only made two. BUT I WANT MORE! SO! My next step will be to get a couple more that are different sizes, glue a candlestick to the bottom of one or two to give different heights, and then I can be completely content. :)


Anyway, they are easy and cheap. PERFECT.

What you need:

styrofoam trees

(I actually used the green florist kind of trees, which I hate...but are cheaper.)

yarn

candlestick (optional)

hot glue

piece of felt

- Cut two felt circles the size of the base of the trees, and hot glued them to the bottom of the trees.
-Put a little dab of glue at the bottom of a tree, stick the yarn to it.
-Start wrapping. It doesn't have to be perfect. By the top you will have covered gaps.
-When you get to the top, put another dab of glue on the tip of the styrofoam.
-attach the yarn by circling it to cover the tip and then gently press yarn into glue.
That's it.
OH! Here is where the candlestick comes in. I was going to do this, but remembered too late that I had used my last dollar store glass candlestick on something else.
- Get a glass candlestick from Dollar Store. Prime & Paint.
- Hot glue or E6000 glue candlestick to bottom of tree. BAM! You got yo self some height!


My new mantle isn't perfect. It is definitely a work in progress, but it's a start.

All the color makes me happy!

Now, I just need to add some more trees in different size and heights!


Heading down to Florida tomorrow, and I am super psyched! I hope to pop back into blog world while I am down there, but if not...

Merry Christmas!

Joy. Peace. Love.

From Paper Wings to you.
- Tracy


Wednesday, December 14, 2011

We Did It!


We survived Chatty Crafty! Ok, so maybe I should say we experienced it... saying we survived makes it sound like it was horrible. On the contrary, I had a great time. Kristy (my Pocketful of Poise partner) did too. Kristy actually wrote up a post for the craft show beginner that I thought was right on it. Check it out.

Sooooooooo now it's done....I have preeeetttty much caught back up with my sleep.....my house is almost back in order (It looked like a tornado went through it last week)....I feel like I am finally on the cupse of whipping something fun for the holidays.


Stay tuned. It's bound to happen. :)

Hope everyone is enjoying this beautiful season!-

Tracy


Tuesday, December 6, 2011

Chatty Crafty is here!!

If you are local, and interested :) stop by and see me!! Paper Wings Studio will be sharing booth #47 with Pocketful of Poise.

The vendors are amazing (obviously...wink wink), the local is fabulous, and it's Christmas time!

Hope to see you there.

For more info, go to ChattyCrafty.com


XXOO-

Tracy


Friday, December 2, 2011

December Craft club- Poppy Headbands!

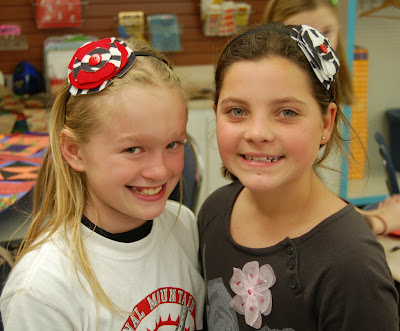
This week was Craft Club week! The girls were super excited because we were going to be making headbands. The headbands we made were modeled after the poppy headband I made in the pic above.

I printed the template for the flower at Factory Direct Craft Blog .

The girls all brought:

a piece of felt

a headband

a button

I provided:

hot glue/hot glue gun

The headbands turned out really fun, and I loved to see how all the different personalities played out in this accessory!
Hard at work!


Isn't she just too stink'n cute?? :)


Cutie pie 5th graders!


Wednesday, November 30, 2011

We Have a Winner!!

Hellllooooooooooooo ladies (and possible gents!)

I wanted to post the results of my

Paper Wings Bundle

giveaway!


And the winner is...............

(insert drum roll please...)


RACHEL RICH who said, "I follow cause I love all the craftiness!"


Rachel- please email me ASAP at


Thanks to everyone who participated!!

Tuesday, November 22, 2011

Finally! A Giveaway!!

I feel like a fraud.


Seriously, how can I call myself a blogger anymore? I have been so very irratic with my posting, and I don't like it. Boo.


Part of the problem is my computer issues (long, boring story...hopefully coming to a happy ending soon), and part of my problem has been this Chatty Crafty project.


Although I am really excited about Chatty Crafty, I will kind of be glad when it's over, and I can focus on other projects.


So! To thank you all who have hung in there with me, tolerating my constant apologizes for being so very absent lately, and in the spirit of Thanksgiving...The GIveAWaY has gone LIvE!!


You could win a Paper Wings Bundle that includes:


*blue/brown headband (pic above)


*set of two button bobbies (pic below)


*one button elastic (pic below)


AND...


*one rosette bookmark (pic above)


Here's what you have to do to enter:
1st way to enter-Become a follower-leave a comment to let me know.
If you are already a follower, just leave a comment saying so.

2nd way to enter-Click on the links below and peruse what I have made for previous craft fairs.
Come back here, and leave a comment letting me know what you like best.
link 1
link 2
link 3

Don't bother reading the post's...just scroll down to see the pics. :)


The giveaway will be open until November 29, 2011! (MY BIRTHDAY!!)


Good luck and spread the word!


Have a Happy Thanksgiving-


Tracy


Monday, November 14, 2011

Creative Crafting- November meeting

Shrinky Dinks. Yes. I love them. SOOOOOOOOO first let me start by saying.... YES, I know... not nearly enough pics of how super stink'n cute the girls charms turned out. (I forgot my camera! ) YES, I know...the pics I do have aren't that great. (I had to use my cell phone, and I got so caught up in helping the girls get jump rings on their charms...totally forgot about pics.) Sorry. I will do better.

Ok, on to the good. This month the girls each received a piece of Shrinky Dink paper (or you can actually use any #6 plastic) They were given free reign over what to create for their charm. I gave them permanent markers, told them to go for it. The girls did a fabulously cute and crafty job. SERIOUSLY CUTE.
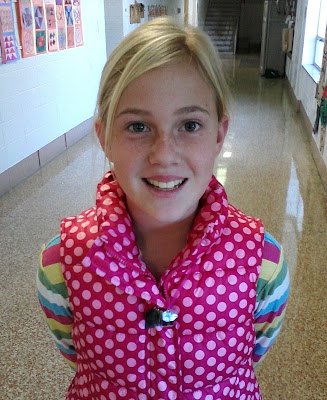
Here is one of my cutie patootie 5th grade girls. Those are her charms hanging around her neck. I think she made one for each of her pets. :)


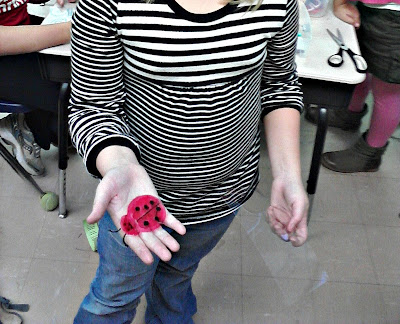
Isn't that ladybug a cute idea?!?!


Here is another one of my 5th graders making a BE HAPPY face. Love it.


The girls had a good time, and I was totally inspired by them to make my own! If I wasn't spending all my free time making stuff for Chatty Crafty....I would make a ton of shrinky dink charms!


PS- I see that I have hit 150 followers! YAY! You all know what that means....GIVEAWAY! Stay tuned...I will be posting it ASAP.


Much love on a Monday-

Tracy


Monday, November 7, 2011

This Year's Family Photos!

Last year, we had a friend of the family, Charles from Charles Coleman Photography, take our family photos. They turned out great, so of course we called him again for this year. Charles is an awesome guy with a big christian heart, AND he takes fantastic photos. Check out his site! Here are a few of my favorites.


Tuesday, November 1, 2011

Classroom Projects

Here is another set of projects that I meant to post lllllllllllooooooooooonnnnng ago!


This year I moved to a new school, and a new classroom. It is always a process to get my room set up at the beginning, but it was doubly hard when I wanted to change EVERYTHING!


I picked a couple of coordinating fabrics/colors, and went to work.


This pic above is from a wall right by my desk. I use the small cork boards (bought at Wal-Mart) to keep all my little reminders on.


I saw some covered clipboards online that were like this, in a set of four, and I loved it. I never use four clipboards at one time, but they are fun....and CUTE! I cut the material out the same size as the clipboard, and used several coats of modpodge to adhere the material. Pretty easy, except aroun the clip. That part can get tricky, and you definitely need a craft knife.


I took a larger (old ) cork board, and made this memory board for my pics. Now I can look at all my loved ones when I am right at my desk!

OH! My last name starts with a C, so I guess I wanted to remind the kids. :)


These big cans were already in my room, left by the previous teacher, and they looked useful. Useful and UGLY! More fabric and modpodge....a little hot glue/ribbon....and so much cuter!


All my plants got a little snazzy piece of material, too. :)


Then.....my bulletin boards had to coordinate.....


These glass jars (use to hold salad dressing) are painted from the inside, and topped with a strip of material. In theory...they are suppose to hold fresh flowers, but...I have yet to bring any in. Opps. I should probably get some fake gerber daisies to put in them. One day.


Oh, and the little wooden crate was some nappy looking thing I found at the Goodwill. I painted and then sanded it a bit to make it look "vintage." It was finished off with a watery glaze.


Lampshade...yes...I attacked that, too. I am telling you, there was no stopping me and my material.


THIS IS MY FAVORITE.


A teacher I use to work with made me a name sign years ago, and I loved it. However, time past, and it started to look raggedy. I made this one to replace it. I love the chevron stripes, and the old typewriter font.


It's hard to tell in the pic, but the bunting flag says w-e-l-c-o-m-e. :)


Well, that's it folks. Is it overload? Too much? Luckily, my room is big with a wall of all windows. My curtains are white shears that are pulled together with...you guessed it...coordinating ribbon. Anyhoo- I get loads of light, and have a big space. It helps spread things out, so it doesn't all come off as "too much."


I love it, and it was a good change to start off at a new school!


Hope you are all having a great November 1st!


(28 days until my b-day!!)


Tracy

OH! I see that as of - right this second- I have 139 followers! Awesome! As soon as I hit 150, I am going to have a fantastic Paper Wings Studio

GIVEAWAY!!!!

(That's right, you want it.)


Related Posts Plugin for WordPress, Blogger...